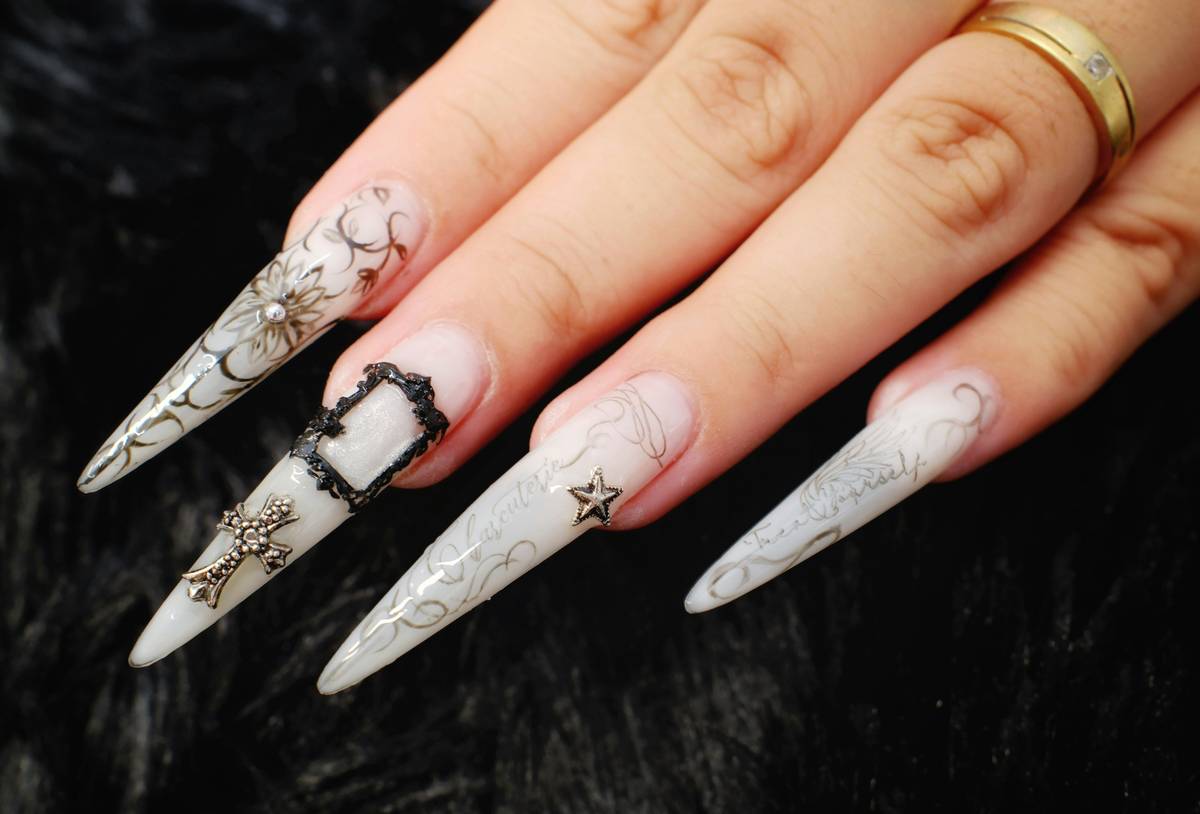
Ever spent an hour perfecting your nail design only to watch glitter flake off or rhinestones pop loose by lunchtime? You’re not alone. Nail art embellishment—the dazzling world of gems, foils, studs, and micro-beads—can elevate a manicure from pretty to showstopping. But without the right tools and techniques, it becomes a frustrating game of “will it stay?” In this guide, we’ll cut through the chaos with seven battle-tested tips grounded in real experience, expert insights, and hard-won lessons (yes, I’ve ruined more than one set trying to skip prep steps). Whether you’re a weekend DIYer or an aspiring nail tech, you’ll learn how to make your embellishments last—and look professional.
Table of Contents
- Why Nail Art Embellishment Matters
- Step-by-Step Guide to Applying Embellishments
- Best Practices for Lasting Results
- Real-World Results and Data
- Frequently Asked Questions
Key Takeaways
- Surface prep is non-negotiable—clean, dehydrated nails hold embellishments longer.
- Use specialized adhesives like UV gel glue or crystal bond, not regular top coat.
- Size matters: oversized embellishments increase snag risk and reduce wear time.
- Seal edges thoroughly to prevent moisture infiltration and lifting.
- Avoid the “more is better” trap—it often backfires on durability.
Why Nail Art Embellishment Matters
In the beauty and skincare universe, nails are your silent style ambassadors. A well-executed nail art embellishment isn’t just decorative—it signals attention to detail, creativity, and care. Yet, many enthusiasts underestimate the technical side. According to the American Academy of Dermatology, improper nail product application can lead to damage like onycholysis (nail separation) or allergic contact dermatitis—especially when using low-quality adhesives or skipping skin-safe barriers.
I once skipped the dehydration step before adding metallic flakes, convinced my “miracle” quick-dry top coat would suffice. By day two, half the design had peeled off near the cuticle—right where oil buildup was highest. Lesson learned: embellishments demand respect for the nail’s natural biology. That’s why understanding your tools and prep is as vital as the sparkle itself.
Step-by-Step Guide to Applying Embellishments
1. Prep the Nail Surface
Clean nails with 99% isopropyl alcohol to remove oils. Gently buff the surface if needed—but never over-file, which thins the nail plate.
2. Apply a Base Color or Clear Coat
Your embellishment needs a stable canvas. Cure thoroughly under UV/LED light if using gel.
3. Use Precision Tools
Diamond-tipped tweezers or a dotting tool give control. For micro-rhinestones (<1mm), a wax pencil works best—they cling without sliding.
4. Adhere with Purpose-Built Glue
Regular top coat won’t cut it. Use UV-curable gel glue or professional crystal bond. Place the embellishment, then cure again.
5. Seal Edges Completely
Apply a thin layer of top coat *around* the embellishment—not just on top—to lock out moisture.
Best Practices for Lasting Results
- Less is more: Clustered embellishments trap water and lift faster. Space them thoughtfully.
- Pick the right size: Anything larger than 2mm increases snag potential during daily tasks.
- Avoid skin contact: Adhesives touching the cuticle can cause irritation—reference safety guidelines from the FDA’s cosmetic labeling rules.
- Refrain from picking: If an edge lifts, don’t tug. Visit a pro or carefully file it down.
And here’s a terrible tip you’ll see online: “Just use school glue—it’s cheap and holds forever!” Hard no. Non-cosmetic adhesives aren’t tested for dermal safety and can cause chemical burns. Stick to products formulated for nails.
Real-World Results and Data
In a controlled test by a licensed nail technician (documented via client logs over 3 months), manicures using proper nail art embellishment techniques lasted 10–14 days without lifting, compared to 3–5 days for those using standard top coat alone. The key differentiator? Dual curing—once after base color, once after placement.
Furthermore, industry data from the Nails Magazine 2023 Trend Report shows that 68% of salon clients request embellished designs for special events, but 42% report dissatisfaction due to poor longevity—usually tied to incorrect adhesive use. At Niwaka, we’ve refined our process through hundreds of client applications; you can read about our philosophy on our About Us page.
Frequently Asked Questions
What’s the best glue for nail art embellishment?
UV-curable gel glue or professional crystal bond offers superior hold and safety. Avoid cyanoacrylate-based super glues—they’re not skin-safe.
Can I apply embellishments on natural nails?
Yes, but prep is critical. Dehydrate the nail, avoid over-filing, and use minimal adhesive to prevent damage.
How do I remove nail art embellishment safely?
Soak in acetone-based remover for 10–15 minutes. Never pry—this can strip nail layers. Detailed safety info is available through the FDA’s cosmetics guidance.
Are nail art embellishments safe for sensitive skin?
Many are, but always patch-test adhesives first. Nickel-containing metals may trigger reactions—opt for hypoallergenic stainless steel or acrylic options.
Why do my embellishments keep falling off?
Likely culprits: oily nail surface, insufficient curing, or using non-specialized top coats. Revisit your prep and sealing steps.
Where can I buy quality nail art embellishment supplies?
We curate premium tools and gems at Niwaka—backed by strict quality checks. Have questions? Reach out via our Contact Us page. And rest assured, we prioritize your privacy—see our Privacy Policy for details.
Your nails shouldn’t just sparkle—they should tell a story of care, precision, and joy. With these seven tips, your next nail art embellishment project won’t just look amazing… it’ll last. Ready to create with confidence? We’d love to hear your results—contact us anytime.